
Manage your organization and workspaces
Organization settings control who can do what, and in which workspace. For the model, see Organizations and workspaces.
Open Settings, then choose the Organization scope in the settings navigation.
Before you begin
Section titled “Before you begin”Decide which responsibilities belong at the organization level and which belong inside one workspace. Use separate Production, Staging and Development workspaces when their Agents or Connections should never be interchangeable.
Members
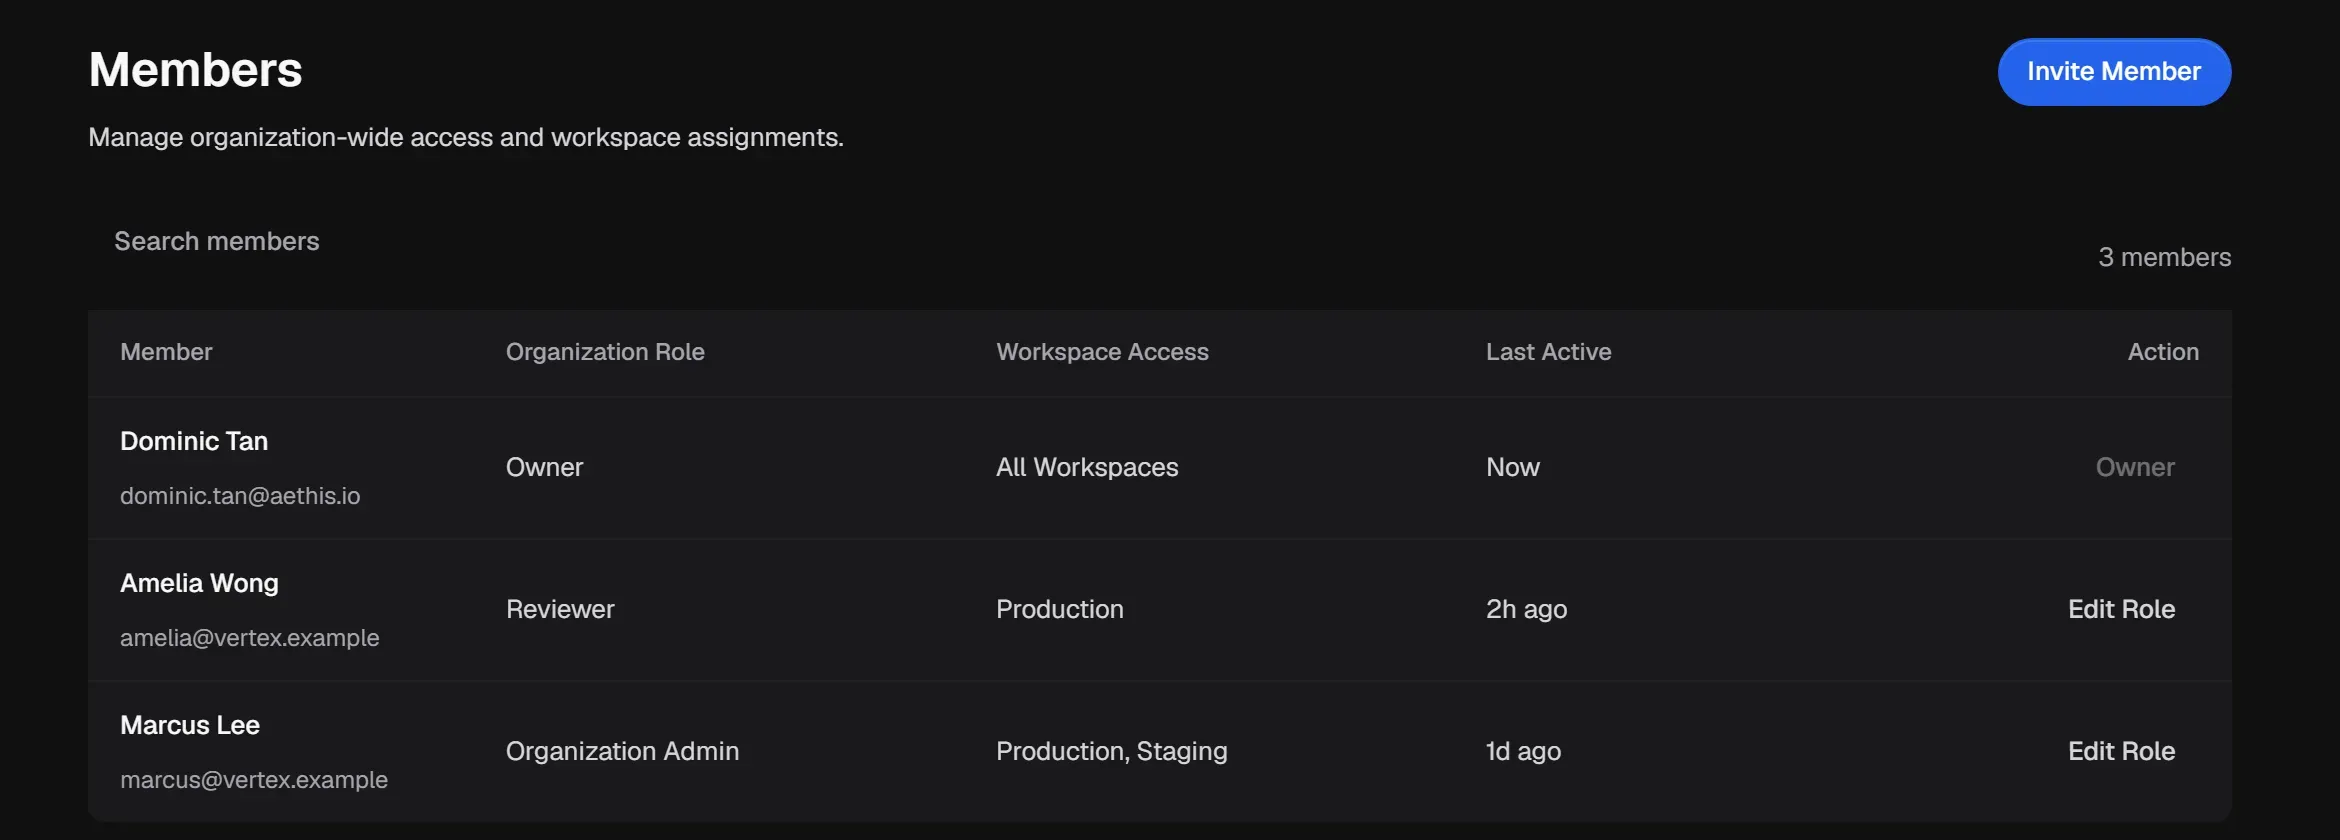
Section titled “Members”Members lists everyone in the organization with their Organization Role, Workspace Access and when they were last active.
Invite a member
Section titled “Invite a member”-
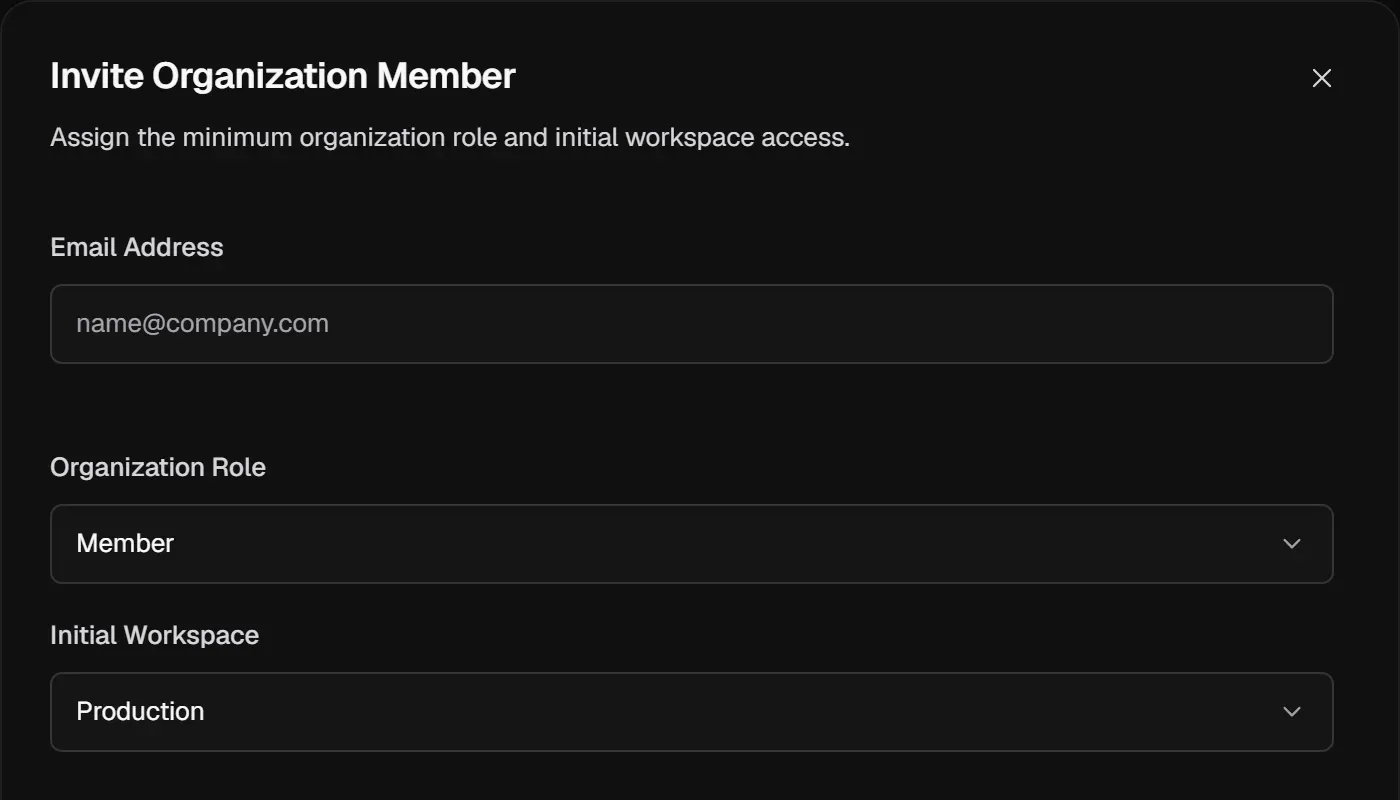
In Members, select Invite Member.
-
Enter their Email Address.
-
Choose the minimum Organization Role they need: Member, Reviewer or Organization Admin.
-
Choose their Initial Workspace, or No Workspace.
-
Select Send Invitation.
Expected result: the member appears with the selected organization role and initial workspace access. For a reviewer, confirm that the Approval Queue for that workspace is visible before relying on them for production coverage.
To add an approval reviewer, invite them as Reviewer with access to the workspace whose approvals they’ll handle. The Bring in an approval reviewer journey on Get started walks you through it.
Change a role
Section titled “Change a role”Select Edit Role on a member’s row. The Owner role can’t be edited from this list.
Roles & Permissions
Section titled “Roles & Permissions”Roles & Permissions lists built-in and custom roles with their members and key capabilities. Select Create Role to define a narrower role, such as a reviewer for production only, and Edit Role to change a custom role.
Workspaces
Section titled “Workspaces”Workspaces lists each workspace with its environment, administrator and members, and status. Select Create Workspace to add one.
Keep production and non-production work in separate workspaces. Agents can only use Connections from their own workspace, so a staging Agent can’t reach production tools by accident.
After creating a workspace, add its members, set its spend control, and create workspace-specific Connections before registering Agents. If an Agent cannot attach a Connection, compare their workspace IDs first; cross-workspace assignment is intentionally unavailable.
Switch organization or workspace
Section titled “Switch organization or workspace”- The organization switcher at the top left lists your organizations. Select Manage organizations for more.
- The workspace switcher in the top bar lists the workspaces in the current organization. Select Manage workspaces to open this settings page.
Workspace settings
Section titled “Workspace settings”Open Settings with a workspace selected to manage that workspace: its name and environment in General, who can access it in Members & Access, and its enforced monetary ceiling under Workspace spend controls. See Manage spend and usage.